Photography Tips for Capturing Fall Scenery
By Tina – Storyteller & Trail Photographer at HikerHeritage.com
Why Fall Is My Favorite Season to Shoot
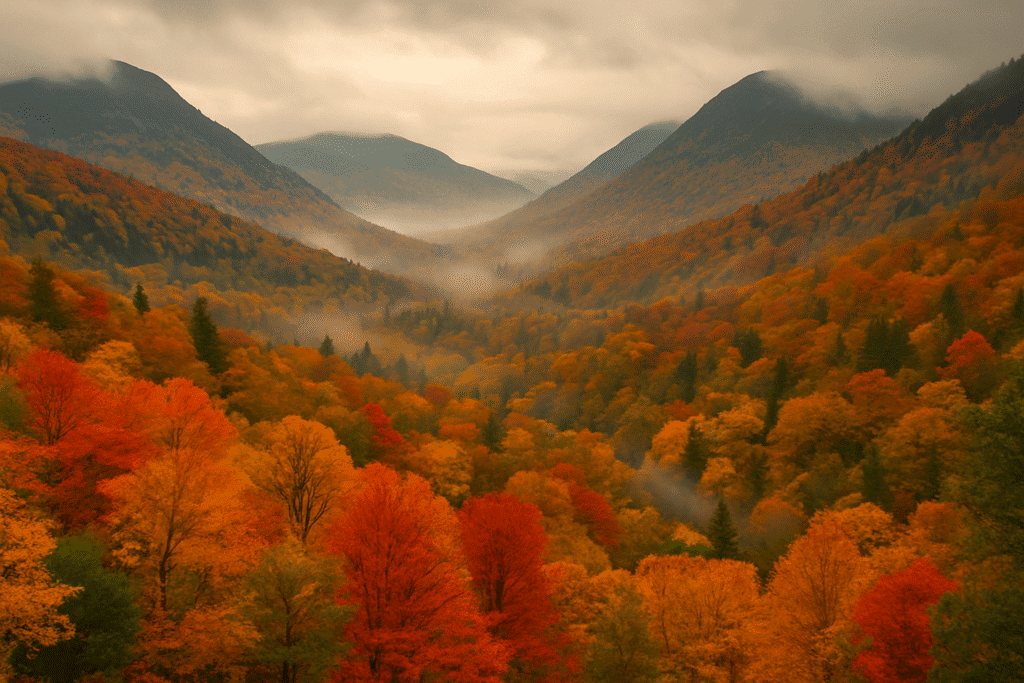
There's something about fall that feels like magic—and maybe that’s why I always find myself reaching for my camera more often in October. The way sunlight filters through golden leaves, the quiet stillness of the trail, and the contrast of shadows dancing across vibrant reds and oranges—it’s like nature’s final exhale before winter sets in.
I’ve photographed dozens of seasons across the country, but autumn always pulls me in deeper. The colors are short-lived, yes, but that’s what makes each photo feel like a little miracle. In this guide, I’ll share everything I’ve learned about capturing the heart of fall on camera—whether you’re hiking with a DSLR or your phone in your pocket.
🔎 Browse Our Trail-Tested Gear Reviews1. Follow the Light – It Changes Everything
Autumn light is soft, warm, and ever-shifting. The golden hour—right after sunrise and just before sunset—is when the magic happens. Leaves appear richer, shadows stretch longer, and landscapes gain a kind of cinematic depth.
- Morning Light: Great for cool blue tones, mist, and dew. Use this to capture tranquil, moody scenes.
- Afternoon Light: Best for saturated reds and yellows—watch for overexposure though.
- Golden Hour: Perfect for backlit leaves and silhouettes. Position the sun behind your subject for glow-through effects.
Pro tip: Overcast days might seem dull, but they’re actually perfect for shooting even, shadowless light—great for leaf closeups and forest compositions.
2. Compose with Contrast and Texture
Fall colors are powerful—but don’t just rely on them to make your photo interesting. Think about what’s behind the color: texture, pattern, balance, and movement.
- Use natural frames: Overhanging branches, tunnel-like tree paths, or arched logs.
- Include a focal point: A hiker in the frame, a winding trail, or a rustic cabin adds scale and story.
- Look for contrast: Yellow leaves against a blue sky. Red trees reflected in still water. Moss on bark.
- Change your angle: Shoot from low to catch falling leaves. Get close to texture. Look up through the canopy.
Photography in fall isn’t about chasing color—it’s about telling a story with that color. What does the scene feel like? What detail pulled you in? Start there.
3. Gear Essentials for Hiking Photographers
I don’t believe in lugging a heavy rig miles up a trail—especially in cold weather when you need to move light. Here’s what’s in my camera kit for fall hikes:
- Mirrorless Camera: I use the Sony α6400. Compact, lightweight, and excellent color reproduction.
- Wide-Angle Zoom: 18–105mm is perfect for capturing landscapes, forests, and sweeping scenes.
- Mini Tripod: Something like the JOBY Gorillapod lets you stabilize without the bulk.
- Lens Cloths: Cold mornings = foggy lenses. Keep one handy in your hip pocket.
- Smartphone (with Pro Mode): Phones these days are incredible. Turn on RAW capture if available. Use HDR sparingly.
- Extra Battery: Cold temps drain juice fast—always carry a backup.
And most importantly, bring a dry bag or padded pouch to protect your gear from damp leaves, creek splashes, or sudden drizzle.
4. Best Trails for Fall Photography
If you’re looking for jaw-dropping fall scenes to capture, these two trails are near the top of my all-time list:
🍁 Trail 1: Acadia National Park – Beehive & Jordan Pond (Maine)
Vibrant maples, reflective lakes, and granite ridgelines make Acadia a photographer’s playground. The loop around Jordan Pond provides mirror-like reflections at sunrise, and the Beehive Trail offers elevated shots of the canopy below.
🍂 Trail 2: Shenandoah National Park – Stony Man Mountain (Virginia)
Skyline Drive is breathtaking, but the real photo magic happens at the summit of Stony Man. You’ll get sweeping views of layered ridges glowing in orange and red, especially in late October. Bring a telephoto lens to compress the mountain layers into painterly frames.
5. Editing Tips to Keep it Real
Fall photos can be overcooked real fast. Here's how to edit without ruining nature's beauty:
- Warm up the tones, but keep it subtle. Use the temperature slider in Lightroom sparingly.
- Adjust contrast and clarity, not saturation. That keeps things rich without looking fake.
- Crop for story, not just symmetry. Sometimes leaving a little negative space draws the viewer in.
- Add a vignette or dehaze for depth. This mimics how we naturally perceive distance and atmosphere.
6. Stay Safe, Stay Aware
Photography on the trail can be distracting. I’ve twisted an ankle because I was too focused on framing and not watching my feet. Always:
- Scan the area before stepping back for a shot.
- Check the weather—fall conditions change fast.
- Pack layers and gloves (cold fingers don’t photograph well!).
- Let someone know your route if you’re solo shooting.
Final Thoughts
If you’ve ever paused mid-hike just to stare at the way light filters through a golden aspen grove—you’re already halfway to being a fall photographer. You don’t need the fanciest gear. You just need to notice. To slow down. To click when something stirs you.
Fall won’t wait. But you can capture its soul one image at a time.
📸 Explore Our Other Trail Gear ReviewsFAQs
What month is best for photographing fall foliage?
Typically mid-October, but it depends on the region. Northern states peak earlier, southern later. Check local foliage trackers!
Is it safe to bring a DSLR on a hike?
Yes—just use a padded case or sling bag and avoid overly rugged scrambles. A mirrorless or smartphone might be better for tough terrain.
How can I get that glow-through-leaves look?
Stand with the sun behind the tree, lower your angle, and shoot into the light—early morning or golden hour is best.
Got your own favorite trail or tip for fall photos? Email me or tag us on Instagram—we’d love to feature your shots!