10 Creative Food Hacks to Transform Your Next Outdoor Adventure
Picture this: You’re miles from the nearest kitchen, surrounded by nature’s beauty, and your stomach starts to rumble. Instead of unpacking another sad, squished sandwich, you pull out a delicious, freshly prepared meal that feels gourmet. Sound like a dream? With a little creativity and planning, it can be your reality. Outdoor dining doesn’t have to mean bland, boring, or bulky food. Whether you’re hiking, camping, kayaking, or just enjoying a long park day, these clever food hacks will elevate your alfresco eating game, save you space, and turn mealtime into a highlight of your adventure.
Let’s ditch the basic trail mix and unlock a world of flavorful, easy, and satisfying outdoor meals.

Hack #1: The Omelet in a Bottle (No Mess, No Fuss)
Who says you can’t have a hearty breakfast on the trail? This hack is a game-changer for campers.
How to do it: Before you leave, crack 2-3 eggs into a clean, durable plastic water bottle or a reusable silicone bottle. Add in your favorite omelet fillings—diced peppers, pre-cooked sausage or bacon bits, shredded cheese, and a pinch of salt and pepper. Seal the bottle and give it a good shake. When you’re ready to cook at camp, simply snip a corner of the bottle (if using a soft bottle) or pour the mixture directly into a hot, lightly oiled pan. In minutes, you’ll have a perfect, fluffy omelet with zero shell-picking or messy bowls to clean.
Pro-Tip: Use pasteurized liquid eggs for an even safer, more convenient option, especially on longer trips.
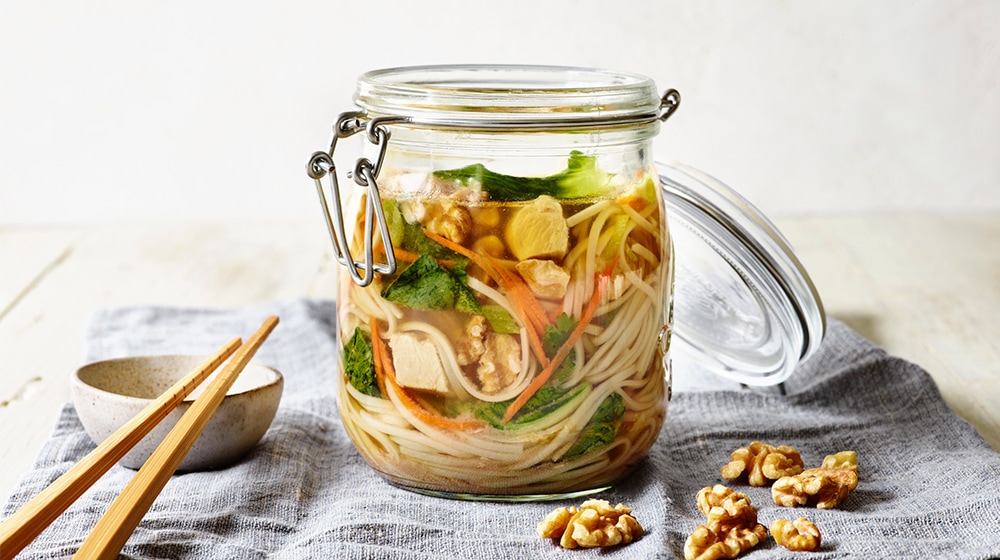
Hack #2: DIY Instant Soup & Noodle Jars
Move over, expensive store-bought backpacking meals. Create your own lightweight, flavorful instant lunches.
How to do it: Layer ingredients in a mason jar or airtight container. Start with quick-cook noodles (like ramen or rice noodles) or instant couscous at the bottom. Add dehydrated vegetables, a bouillon cube or powdered broth, and your protein—freeze-dried chicken, tofu jerky, or dehydrated beans. Season with garlic powder, ginger, or chili flakes. At mealtime, just add boiling water, seal the jar to let it steam for 5-10 minutes, and enjoy a hot, restorative meal.
Flavor Combo Inspiration:
- Miso Ginger: Miso paste packet, rice noodles, dehydrated mushrooms, and wakame.
- Spicy Thai Peanut: Rice noodles, powdered peanut butter, chili flakes, and dehydrated veggies.
- Hearty Italian: Couscous, sun-dried tomatoes, Parmesan cheese, and Italian herbs.
- Temperature is Critical: Keep cold foods below 40°F (4°C). Use a well-insulated cooler with plenty of ice or frozen blocks. Keep hot foods above 140°F (60°C).
- The Two-Hour Rule: Never leave perishable food in the “danger zone” (between 40°F and 140°F) for more than two hours (one hour if temperatures are above 90°F/32°C).
- Pack Smart, Pack Tight: Use rigid containers to prevent crushing. Separate raw meats from other foods. Pack a small bottle of biodegradable soap and a dedicated scrubby.
Hack #3: Spice Up Your Life with a Tic-Tac Dispenser
Bulk spice containers are a waste of precious pack space. The solution is hiding in your medicine cabinet.
How to do it: Thoroughly clean and dry an empty Tic-Tac container. Use a small funnel to fill each one with a different essential spice: salt, pepper, garlic powder, chili powder, everything bagel seasoning, or even powdered cheese. Label the lids with a tiny piece of tape. Now you have a ultra-compact, waterproof, and spill-proof spice kit that allows you to season meals perfectly with just a few shakes.
Hack #4: The Indestructible Burrito (Foil is Your Friend)
Pre-made burritos often become soggy by lunchtime. This method keeps them fresh and allows for hot, melty cooking at camp.
How to do it: Assemble your burritos at home with scrambled eggs, cheese, and potatoes for breakfast, or rice, beans, and meat for dinner. Here’s the hack: Wrap each burrito tightly in parchment paper first, then wrap it securely in aluminum foil. Freeze them solid. They’ll act as extra ice packs in your cooler on the way to your destination and will thaw slowly, staying fresh. When you’re ready to eat, simply place the foil-wrapped burrito near (not directly in) the campfire coals for 10-15 minutes for a hot, crispy, and delicious meal.
Hack #5: Pancake Mix in a Squeeze Bottle
Pancakes in the backcountry? Absolutely. Eliminate the messy batter bowl with this simple trick.
How to do it: Pre-mix your dry pancake ingredients (flour, baking powder, sugar, salt) at home and place them in a clean, empty ketchup or honey squeeze bottle. Mark the bottle with a line indicating how much water to add. At camp, add water to the line, shake vigorously, and you have ready-to-use batter. Squeeze it directly onto your greased pan or griddle for perfectly portioned pancakes. No lumps, no spillage, and minimal clean-up.
Bonus Hack: Add freeze-dried berries or chocolate chips to the dry mix before you leave!
Hack #6: Create Your Own “Just Add Water” Flatbreads
Fresh bread is a luxury outdoors, but it doesn’t have to be. This simple flatbread requires only two ingredients.
How to do it: Pre-mix self-rising flour with a few tablespoons of powdered milk or plain Greek yogurt powder in a zip-top bag. At camp, add a little water directly into the bag and knead it through the plastic until a dough forms. Tear off pieces, flatten them, and cook in a dry pan or on a rock near the fire for 2-3 minutes per side. Instant, warm flatbreads for dipping, wrapping, or sopping up stew.
Hack #7: The Ultimate Trail Dessert: Campfire Cones
This is a crowd-pleaser that turns dessert into an interactive activity, perfect for families or groups.
How to do it: Grab some ice cream cones (the wafer or sugar kind work best). Let everyone fill their cone with a mix of treats: chocolate chips, mini marshmallows, chopped nuts, peanut butter chips, or diced dried fruit. Wrap each filled cone tightly in aluminum foil. Place the foil packets on a grill over the campfire or at the edge of the fire pit for 5-7 minutes, until the contents are melty and gooey. Unwrap and enjoy a mess-free, decadent s’more-like dessert.
Hack #8: Repurpose a Plastic Jar as a Shaker for Marinades & Dressings
Don’t let your meat or veggies taste bland. A powerful marinade or a zesty dressing can be pre-made and packed without leaks.
How to do it: Use an empty, clean plastic peanut butter or mayo jar. Add your marinade ingredients—oil, acid (vinegar, lemon juice), soy sauce, herbs—right into the jar. When you’re ready to cook, place your protein (chicken, tofu, tempeh) directly into the jar, seal it, and give it a good shake. It marinates evenly without a bag, and the jar is reusable and leak-proof. You can also use a smaller jar for salad dressings—just shake and pour.
Hack #9: Freeze Your Water… and Your Meals
This dual-purpose hack keeps your food cold and provides drinking water as it melts.
How to do it: Freeze water in reusable bottles or a hydration bladder (leave some room for expansion). Use these as the ice packs in your cooler. As they slowly melt throughout the day, you’ll have a constant supply of cold water. Next-level hack: Pre-make hearty stews, chili, or pasta sauces and freeze them solid in zip-top bags. These frozen blocks will also act as ice packs and will be ready to reheat for dinner on your first night, ensuring you eat well with minimal effort after a long day of travel or activity.
Hack #10: The No-Dishwashing Coffee Filter
Enjoy fresh coffee without dealing with a gritty French press or carrying out wet coffee grounds.
How to do it: For a single cup, place your ground coffee in the center of a standard paper coffee filter. Gather the edges and tie it securely with unflavored dental floss or a piece of natural twine, leaving a long tail. You’ve just made a homemade coffee “tea bag.” At camp, boil water, drop your coffee sachet into your cup, and let it steep for 4-5 minutes. Remove the sachet by the tail—all the grounds are contained for easy disposal. Clean cup, great coffee.
Packing & Safety: The Foundation of Food Hacking
Creativity is key, but safety is paramount. These principles ensure your hacks don’t lead to a spoiled trip.
Leave No Trace: Pack out all* your trash, including food scraps, which can harm wildlife. Strain your dishwater through a fine mesh strainer to remove food particles and scatter the strained water at least 200 feet from any water source.
Conclusion: Adventure Awaits, So Does Great Food
Your next outdoor excursion is an opportunity to connect with nature, challenge yourself, and create lasting memories. Don’t let mealtime be an underwhelming footnote. By implementing just one or two of these creative food hacks, you can dramatically improve your outdoor dining experience. It’s about working smarter, not harder, to enjoy delicious, satisfying food that fuels your adventures.
Ready to taste the difference? Start by picking your first hack—maybe the Omelet in a Bottle for your next camping weekend or the DIY Soup Jar for a day hike. Prep it at home, pack it with confidence, and get ready to impress your fellow adventurers. The trail is calling, and now, so is a truly great meal.
—
FAQ: Your Outdoor Food Hack Questions, Answered
Q: Aren’t these hacks a lot of extra prep work?
A: They require a small investment of time at home, which pays off massively in convenience, taste, and enjoyment outdoors. Most take less than 10 minutes to assemble and save you time and frustration at your campsite.
Q: How do I keep food cold on a multi-day backpacking trip?
A: For true backpacking, focus on non-perishable hacks (soup jars, spice dispensers, flatbread mix). For the first 1-2 days, a frozen meal block (Hack #9) in the center of your pack, wrapped in a towel, can keep a few items cool. Otherwise, plan meals that are shelf-stable.
Q: What’s the best protein for longer trips without refrigeration?
A: Look to shelf-stable options like: tuna or chicken in foil pouches, jerky, vegan meat alternatives, nuts/seeds, powdered hummus, dehydrated beans, or textured vegetable protein (TVP).
Q: Can I use these hacks for car camping?
A: Absolutely! Car camping gives you the most flexibility. You can bring a cooler, more ingredients, and even a small camp stove or Dutch oven to really go all out with these ideas.